Creating API Client for Integration
To create an API Client for integration, follow these steps:
-
Click this link to log in to the Workday portal using the Integration System User (ISU) credentials.
-
Search and select Register API Client option from the Search bar.
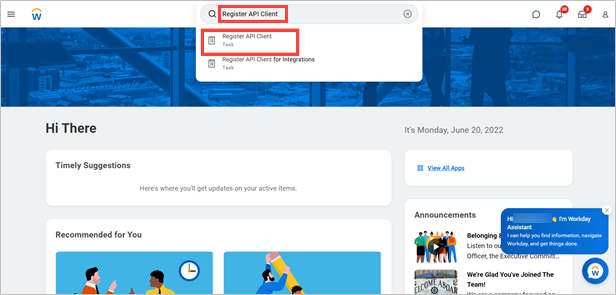
The Register API Client window is displayed.
-
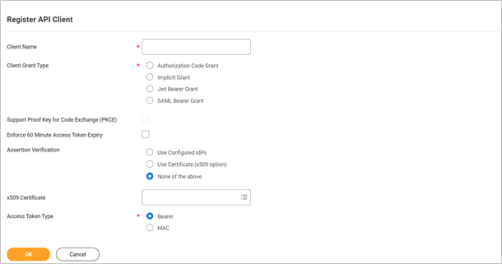
Provide details in the mandatory fields.
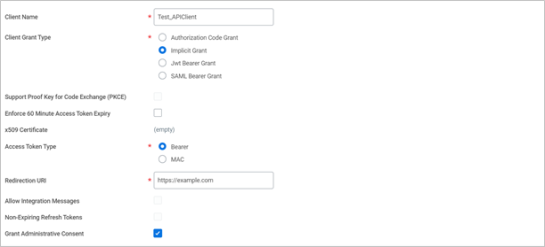
In the above example:
-
Client Name is Test_APIClient
-
Implicit Grant option is selected for Client Grant Type
-
Bearer option is selected for Access Token Type
-
Grant Administrative Consent checkbox is selected
-
-
Click the menu icon in the Scope (Functional Areas) field.
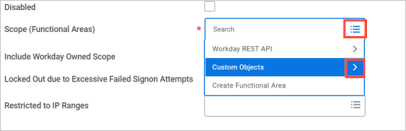
-
Click the drop-down icon beside Custom Objects and select the required scope.
-
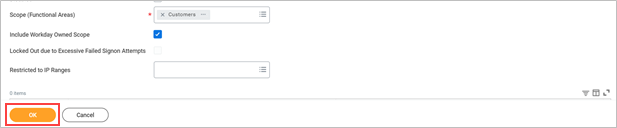
Click OK.
The details of the API client and the Client ID are displayed.

Registering API Client for Integration
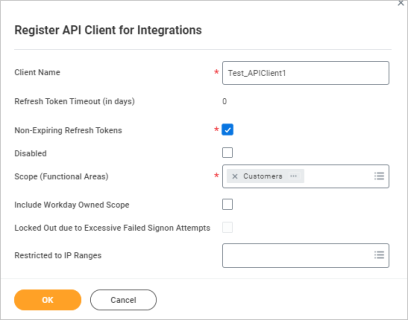
To register the API Client for integration, follow these steps:
-
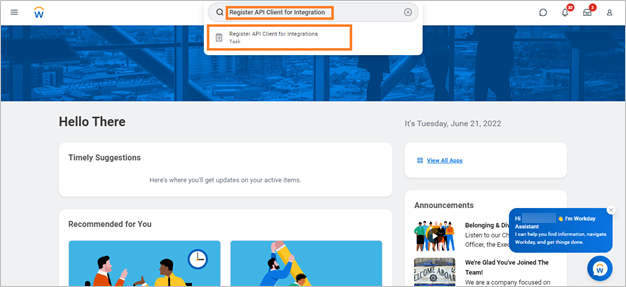
From the Workday portal, search and select Register API Client for Integrations from the Search bar.
The Register API Client for Integrations window is displayed.
-
Provide details in the mandatory fields.

Information
-
Select any value between 1 to 365 in the Refresh Token Timeout (in days) field. The value 30 is displayed by default.
-
To prevent the refresh token timeout, the Non-Expiring Refresh Tokens checkbox is selected by default.
-
Click the Disabled checkbox to disable clients from requesting access to Workday.
-
-
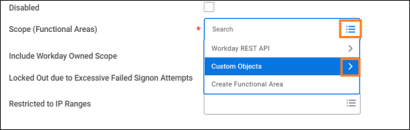
Select the functional areas for the OAuth 2.0 clients to access in the Scope (Functional Areas) field.

Hint
-
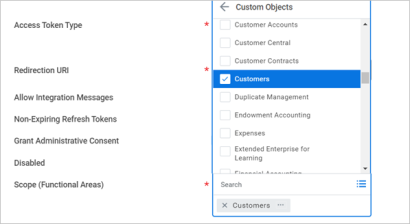
Click the menu icon in the Scope (Functional Areas) field to expand the list of users.
-
Select and expand Custom Objects.
-
Select the functional areas enabled by Workday for the REST API and the custom object domains that require access.

Note
In the Scope (Functional Areas) field, select only the specific custom areas that must be accessed.
-
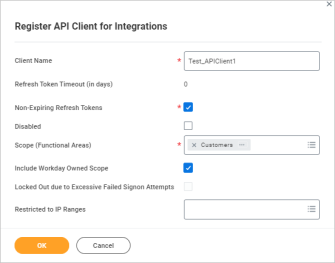
Click the Include Workday Owned Scope checkbox to provide access to the client with the core Workday domains that are not included in the functional areas.
-
Provide details in the Restricted to IP Ranges field to authorize the OAuth client access from specific IP address ranges only.
-
-
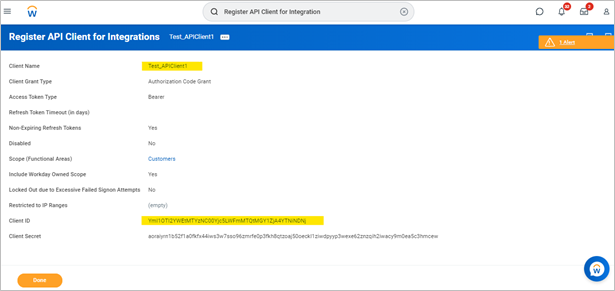
Click OK.
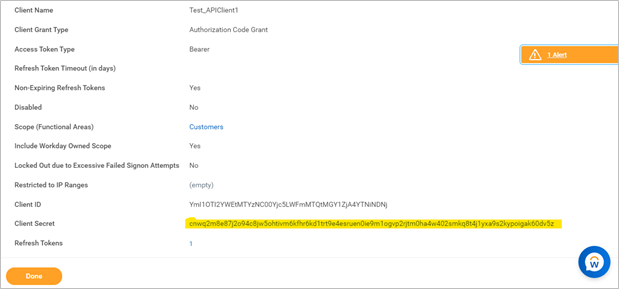
The Register API Client for Integrations screen with the integration details and the Client ID are displayed.
Information
Workday generates an API Client for Integrations with an Authorization Code Grant client grant type, Bearer access token type, unique Client ID, and Client Secret.
Refreshing Tokens for Integration
To refresh the integration token, follow these steps:
-
Navigate to the meatball icon displayed in the top menu of the Register API Client for Integrations screen > API Client > Manage Refresh Tokens for Integrations.
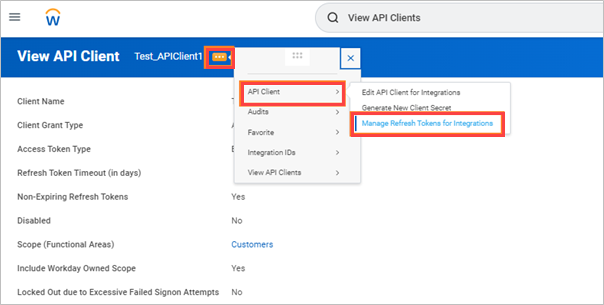
The Mange Refresh Tokens for Integrations window is displayed.
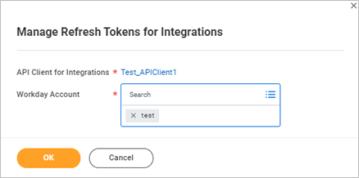
-
Select the Workday Account.
-
Click OK.
The Delete or Regenerate Refresh Token screen is displayed.
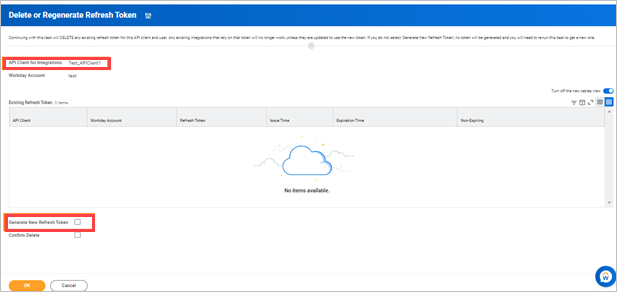
-
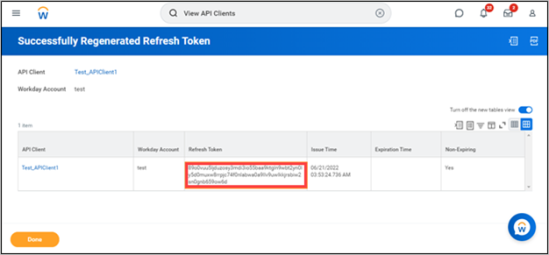
Click the Generate New Refresh Token checkbox.
-
Click OK.
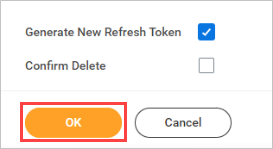
The Successfully Regenerated Refresh Token screen is displayed with the details of the new refresh token.
Generating New Client Secret
To generate a new client secret, follow these steps:
-
Navigate to the meatball icon displayed in the top menu of the Register API Client for Integrations screen > API Client > Generate New Client Secret.
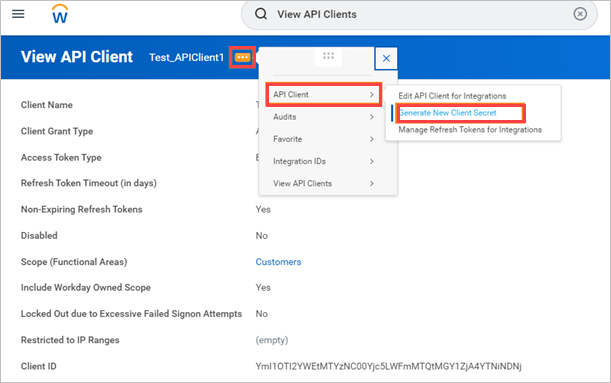
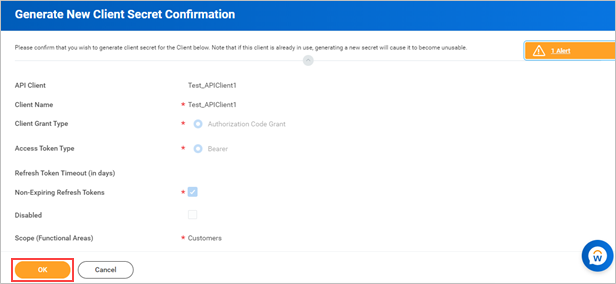
The Generate New Client Secret Confirmation screen is displayed.
-
Click OK to display the Client Secret.